Categories

Showing posts with label Handcrafts. Show all posts

Dec 17, 2014

Christmas Tree Candle

I've been meaning to make these for most of this year ..... just been mulling around in my head how to make it look, in real life, the way it does in my head.  This past Saturday, I finally grabbed some yarn and my dpn's and sat down to create the Christmas Tree Candle & it worked - it looks just like I had envisioned it would.  Soooooooo, without further ado - I share my pattern with all of you and really hope that you like it (oh, this pattern has not been test knit, so, if you have any questions about it just ask & I'll try my best to help you out with it).  ˚Ü˚

Christmas Tree Candle

Materials:
     - 4.0 mm dpn
     - medium weight yarn (I used Red Heart Soft Touch for the candle and Bernat Glow in The Dark yarn for the flame)
     - clothes pin
     - darning needle

Instructions for the candle:

- Cast on 15 stitches, join in the round (being careful not to twist the stitches) and knit each round for 19 rounds.
- *knit 2 tog, knit 3; repeat from * around (12 stitches)
- knit 2 together around (6 stitches)
- knit 2 together around (3 stitches), break yarn
****At this point, I take the tail and weave it through the 3 stitches that are on the needles and then pull it down the center top of the candle so it is on the inside of the tube for the candle, making sure to keep those 3 stitches on the needles because you'll need them to make the flame with.

Instructions for the flame:

- with the yarn for the flame, knit in the front and back of each of the stitches on the dpn's (6 stitches)
- knit 1 round plain (6 stitches)
- knit in the front and back of each stitch around (12 stitches)
- knit 1 round plain (12 stitches)
- knit 2 together around (6 stitches)
- knit 2 together around (3 stitches), removing each dpn as you go until all 3 stitches are left on 1 dpn.
- cut yarn, leaving 4 - 5" long tail (probably overkill on how long the tail should be, but I don't like having too short of a tail when I'm doing the finishing work on a project), thread darning needle with tail.  Insert darning needle in stitch furthest from stitch with the tail.  Slip the stitch from the dpn onto the darning needle, repeat with the other 2 stitches on the dpn.  Pull the darning needle and tail through all 3 stitches, pull tight, tie a knit (making sure that it is as close to the tip of the flame as you can get).  Now, take the darning needle (with the tail yarn still threaded in it) and put it down the tip of the flame, through the bottom of the flame into the candle so that the tail from the flame yarn is on the inside of the tube for the candle.  Remove the darning needle, trim the tail (from both the candle yarn and the flame yarn) & insert the clothes pin (handle will be closest to the flame).  Place candle on tree by squeezing the sides of the candle to open the clothes pin, place on tree branch and let go of candle.

Jan 13, 2014

Current Projects

Well, after a few weeks of perusing Ravelry, deciding on patterns and adding them to my Christmas Gift list, I have gotten started on one of the items today.  Unfortunately, I can't post a picture of it, or tell you what it is, because the recipient reads my blog.  ˚Ü˚

Thursday of last week I took my loom to weaving & started getting a new warp wound to put on it.  I had bought some cones of 100% cotton & I'm planning on weaving some dish towels.  This Thursday coming up, I'll need to finish winding the warp, and then I can start putting it on the loom.


It kind of looks like I'm just mixing the colours together, but, I'm actually attempting to make a striped warp.  Once the warp is put on the loom, the weft will also be striped - this will hopefully create a checkerboard type of look.  ˚Ü˚


I'll post progress pictures of how the towels are turning out as I work on them.  ˚Ü˚

I finished making the hooded scarf on my small rigid heddle loom ..... it turned out exactly as I had imagined it would.  We gave it to my Mom for Christmas - haven't heard how she likes it.


My DD was gracious & modeled the scarf for me .... the above pic is the front view, and here is a picture of the side view - I'm pretty happy with how it turned out.  ˚Ü˚


Nov 28, 2013

Weaving a scarf

Today I started weaving a hooded scarf .... I'd been envisioning how this would look and I have to say, it is exceeding my expectations on how it looks, lol.

The warp is white Red Heart Super Saver and the weft is a white & blue variegated yarn (same weight as the warp, just don't know the brand).  The width, on the loom, is 11 1/8" .... not entirely sure how long it will be once it's finished.

I don't have a recipient in mind for it, yet ..... not sure if it will be a Christmas gift, if I'll keep it, or if I'll give it to Charlotte (like she's been hinting at since she's seen it, lol).


Oct 16, 2012

New project

Since the weather has started turning cooler, I figured that I would make a hat for my friends Granddaughter ..... it's a cute little hat, and it was sooooooo easy to make.  I can hardly wait to see it on her:


Sep 4, 2012

a bit of this & that

Today we started our 4th week of homeschooling .... the kids are really enjoying everything that we've scheduled (well, okay, maybe Charlotte isn't thrilled about Science .... but, we can live with that, lol).

The best part of our day is our first class - we begin our day with Bible ..... after gathering our beverages (usually tea for me, coffee for Josh & hot chocolate for Charlotte - especially since it is starting to turn cooler in the mornings), we settle at the kitchen table & we pray - sometimes it is the Lord's Prayer, but most often, we pray for our day/friends & family/safe travels when we have to go someplace later on in the day/most of all, though, we pray that God is with us throughout the day (sometimes with an arm around our shoulders & sometimes with a hand over our mouths, lol).  After we have prayed, we open our Bibles & we flip to the current book we are studying (right now it's Micah) .... we take one chapter at a time & we all read a verse until the end of the chapter, then it's discussion time about what we've read & we use the Bible marking pens that I purchased at Scott's Parables (specifically for this time).  It's really great to hear the kids insights to what we're reading & see how they are applying these lessons in their daily lives.  Once our Bible study session is completed, the kids work on their memory/copywork exercises - they currently have 2 memory verses down and are working on their 3rd one.  ˚Ü˚

The other day, I glanced over at Josh and was amazed at how much he has grown .... not just in stature (he's tall & getting broad across the shoulders), but maturity as well - I'm pretty sure that his job has had a lot to do with that.  It reinforces, to me, how important it is to surround yourself with Christians that actually "walk the walk", not like some people who only claim to be Christians but only give it lip service & help those who they feel are worthy of being helped - Josh's employers are definitely Christians that walk the walk & you can feel it as soon as you walk through the doors of their restaurant.

Last month I had some of my woven items in a Handcraft Show - there were no prizes for doing this, it was simply a way for people to check out what can be done with weaving.  I had three items there:  the very first blanket that I wove on a floor loom, my Skittles bag that I made on my rigid heddle loom & a shawl that I made on a 4-heddle table loom (first time using one of them) ... here are some pictures of it (both in progress & completed):

This is shortly after I started weaving the shawl
 
I've got quite a bit done on it, now - it's looking really good.  ˚Ü˚

Charlotte modeling the shawl for me

the front of the shawl

a close up of the pattern that was used.
In our front yard we have an apple tree - the tree produces medium sized yellow apples that are quite tart if you just pick one off the tree and start munching on it.  But, I've discovered that it makes amazing apple juice, soooooo, I've been very busy with making & canning the apple juice - as of tomorrow, I should have 30L of apple juice made (thanks so much for the recipe, Mom):

first batch of apple juice made.
Another item that will be made & canned, using our apples, is Crockpot Apple Butter - a friend of mine shared the recipe and it is sooooooooooo good.  If I have time, I'd also like to make & can a few jars of apple pie filling (the recipe for that is in the Company's Coming Preserves cookbook.  ˚Ü˚

Dec 12, 2011

Super Easy Christmas Toque

Yesterday we had our Homeschool Christmas party, we had soooooooo much fun ..... we exchanged gifts, played games, the kids were taken on a sled ride (a calf sled pulled behind a quad - not really sure who enjoys those more .... the kids or the Dad that drives the quad, lol).

Anyway, I had decided a while ago (before the party was planned), that I wanted to make a friend of mine a mitten and scarf set - the mittens I made were the double thick ones that I've been making lately, and the scarf was going to be woven on my Tia Rigid Heddle loom (this loom has definitely been worth the $3 I spent for it ˚Ü˚).  Three days before the Homeschool Christmas party, I decided that this set needed a toque to go with it - I couldn't find a pattern for a really easy/quick toque, soooooooooo, I came up with my own pattern (which I'm sharing here ˚Ü˚) ...... my friend gave me a beautiful ceramic mug (it has blues, purples and a bit of cream colouring all over it) and a jar of Peppermint Flavoured Mocha drink mix - which I'm enjoying, right now, as I'm sharing this blog entry, lol.  ˚Ü˚

Super Easy Christmas Toque


Materials needed:
  • worsted weight yarn
  • 4.5 mm circular needle (minimum 40" long for magic loop)
  • darning needle
Directions:
  • with white, cast on 100 sts, divide these stitches for magic loop, so, 50 on each side.
  • mark the beginning of the round, and work a K2, P2 rib for 3" (being careful not to twist your stitches when your knitting in the round).
  • when the 3" of ribbing are completed, change to blue yarn and knit in the round until piece measure 8" long (this is measured from the cast on edge to the stitches that are on your needles).
  • begin decreases as follows:
  • *knit 8, knit 2 together - repeat from *, (you should end each decrease round on a knit 2 together)
  • knit 90 stitches
  • *knit 7, knit 2 together - repeat from *
  • knit 80 stitches
  • *knit 6, knit 2 together - repeat from *
  • knit 70
  • *knit 5, knit 2 together - repeat from *
  • knit 60
  • *knit 4, knit 2 together - repeat from *
  • knit 50
  • *knit 3, knit 2 together - repeat from *
  • knit 40
  • *knit 2, knit 2 together - repeat from *
  • knit 30
  • *knit 1, knit 2 together - repeat from *
  • knit 20
  • *knit 2 together - repeat from *
  • knit 10
  • cut yarn, leaving a 10" tail for weaving in, take darning needle (thread it with the yarn you cut) and run it through the 10 stitches remaining on your needles, pull tight to close the hole.  Run your needle through those same 10 stitches, again (this really secures those stitches).  Now, push the needle through the center, where the hole was (you're taking your needle from the outside (public side) of the toque to the inside (non public side) of the toque).  Finish off as usual (meaning, weave in the rest of the tail - I like to weave in a lot of the tail, so, if it starts to come apart, I have yarn to work with in order to fix it).
  • Make sure to weave in any ends from the cast on edge and where you switched yarn from ribbing to stockinette stitch.
  • Last step ..... make a pom pom, using the same colour of yarn that was used for the ribbing and attach to the top of the toque.

Here's a picture of the whole set that I made for my friend - she absolutely loved it:

Nov 22, 2011

recently completed projects

A month (or so) ago, we were in Wal-Mart and I saw a woman wearing a toque that looked like a cupcake.  Since then, I have been wanting to make one for myself and, this past week, I did make one ..... complete with sprinkles on top.  ˚Ü˚


Charlotte made the pompom (the cherry) for the top of the toque - she did that while I was finishing up knitting the "icing".  ˚Ü˚


I really like this picture of Charlotte modeling the Cupcake Hat for me.

I also made up some thumbless baby mitts ..... one pair is for my great-niece (I played with the pattern and made hers double thick) and one pair is for a friend of mine from Church.  I also added the string to keep them in the sleeves of their jackets.  The pattern for these mitts was a very easy one to follow ..... I played with it a bit, when I made the mitts for my great-niece (I made them double thick):


The ones pictured above are single thickness ..... and here are the double thick ones I made for my great-niece (I made them grey because I'm figuring that a future little brother/sister could wear these as well):

Apr 20, 2011

Tea Spout Drip Catcher

The other day, I was visiting a friend - she offered me a cup of tea and when she went to pour the tea, her teapot dripped tea from the spout (creating a small puddle on the table) ..... she ended up wrapping a piece of paper towel around the spout to catch the drips.  This got me thinking and when I got home that afternoon, I got out my needles and some cotton yarn ..... this is the result of that encounter.  ˚Ü˚

Tea Spout Drip Catcher


Materials:
4.5 mm (US 7) needles
Bernat Handicraft Cotton

Directions:
1 - Cast on 16 stitches
2 - Knit in stockinette stitch for 6 rows
3 - knit 2, purl 2 for 4 rows
4 - Knit in stockinette stitch for 6 rows
5 - Bind off loosely, leaving a tail for seaming the edge closed
6 - Weave in all loose ends, make sure ends are rolled and place on your teapot spout.

Mar 15, 2011

MIA

Well, it seems like a long time since I have updated my blog .... things have been going not to bad around our little acreage - both the kids have been keeping busy with their school work, I had my hours increased at the store I work at (went from 1 day a week to two) and Don has been enjoying the work he's been doing at his job.  ˚Ü˚

For the past few months I have been having trouble with my voice leaving, for no reason .... at the urging of our Pastoral Nurse, I finally broke down and went to see the Doctor.  The best guess that he could come up with was that I had cysts on my vocal cords ..... these, he said, were being caused by the use of my steroid inhaler (which I only use when I have a cold).  He recommended that I stop using that particular inhaler (I'm still using my regular inhaler) to see if my voice would come back after not using it.  Great news, it has .... however, I still have a scratchy feeling at the base of my throat and no amount of coughing takes it away.  I'll have to talk to him about that - he may refer me to a specialist, after all.

It was also discovered, at my Dr. appointment that I have high blood pressure - he put me on some medicine for that, sent me for some tests and I go back on Thursday for the results of them ..... I'm not really sure what kinds of questions I should be asking him about this - I know that I do want to find out if I can eventually get off of this medication .... not that it's reacting with me, it's actually working quite well for me.  I'm just not the type of person that likes to take pills all the time, no matter how small they are.  ˚Ü˚

Things on the knitting front are going quite well ..... I recently had a knitting order for elf stocking looking legwarmers - today I finished seaming them together and I think they turned out quite well (sorry for the poor picture - I took this with my phone and it doesn't have the best quality):
 
Even my darling daughter likes them .... she has requested a pair, lol.  I told her that if I make her a pair, they won't be striped like these ones are - I'll either use self-striping yarn or a solid colour for them.  ˚Ü˚

I had made a mistake on my cape and had to rip it out - progress is going okay on it .... actually, I really need to sit down and be more intentional about working on it.  Part of it, though, is that I've been working on one of the accessories that go with the cape .... the pattern is for a tam, but, since I don't look good in those, I'm converting it to a neckwarmer (or cowl) - I'm really loving how it is turning out, so far ..... the only differences with it are (1) changed the needle size to a 6 mm, instead of a 4 mm and 5 mm, (2) changed the cast on number to 140, rather than 96, and (3) instead of doing the decreases for the crown of the tam, I'll simply keep knitting in pattern and finish off in ribbing.  I'll try to remember to post pictures of it when it is done.  ˚Ü˚

Feb 10, 2011

My Celtic Cape

Yesterday, I restarted my Celtic Cape .... I wasn't really happy with the first wool that I had spun and plyed - which was also the yarn that I had started the hood facing with.  It was "hard" wool .... didn't have any give to it, at all ..... so, yesterday, I restarted with the last batch of wool that I had spun and plyed.  This wool is amazing to work with - it's not a soft wool, but I don't really want a soft wool since it's going to be an outerwear garment .... I am planning on having it lined once it's completed though, so that should help out somewhat, lol.

We've (the people participating in this KAL) have been getting "Bonus" patterns to go along with our Cape .... the first one was a toque (or, hat, for those that don't know what a toque is, lol).  I'm planning on making that one up in some alpaca (or maybe it's llama) that I received in a knitting swap - it's the same colour as what I'm using for the cape ..... a whole lot softer and less itchy, though.  ˚Ü˚  We also received a pattern for a pair of socks, which I'm thinking of knitting up, as well - later on in the year, though.  I've heard that there will be patterns for mittens, a tam, a scarf (I think) .... not sure what else this wonderful group will surprise us with.  ˚Ü˚

Here is a sneak peek at the start of my cape .... I made up the cover page for this pattern and I'm making sure that all the pattern pages are put into page protectors - since it's a year long KAL, I want to make sure that I have all the pages where I can find them ...... which is why I went with a red binder - wanted to make sure I would be able to find it, lol:


My MIL made me the yarn bell for Christmas a couple of years ago - it works wonderfully for holding the cakes of yarn that get made on a yarn winder.

Feb 8, 2011

Spinning wool

For the past few weeks I have been very busy spinning wool for my fingertip length hooded Celtic Cape ..... it's a KAL that I'm participating in, over on Ravelry.  I decided that I would spin the wool up for it, since I have it waiting for me to do something with, anyways, lol.  At present, I have 226 yards of wool spun and plyed ..... I can definitely see that this could turn into an addictive hobby, lol.  ˚Ü˚

Here is a picture of a regular sized bobbin with a single ply of wool spun up on it:


Today, I received my new Freedom Flyer in the mail - it is a jumbo flyer and bobbin for my Ashford Joy .... tonight I put it to use and was very, very pleased with the results.  On it is a 3 ply wool that I made from the singles I had spun onto 3 regular sized bobbins:


Don had made me a Niddy Noddy for Christmas, it is a 2 yd one .... meaning that one pass of wool over all four ends equals 2 yds of wool.  Wound onto my Niddy Noddy is 150 yds of 3 ply wool:

Jan 15, 2011

Here's the plan

The other day, while I was checking out Ravelry, I noticed a new KAL for a Celtic Hooded, fingertip length, cape.  Now, for those that know me, they know that I am a sucker for cables ..... I absolutely love them - for a little bit of effort you get a lot of "WOW" factor, lol.  So, I signed up for it - the only downside that I could see is the amount of yarn required for it ..... I think I saw the number 4500 yds floating around on that particular site.  Anyway, there is now way that I could plop down the kind of cash it would take to make this particular cape ..... the wheels in my head started to turn and it suddenly dawned on me that I have a boatload of unspun wool just waiting to be spun.  A lightbulb went off and I was suddenly very excited to get spinning for this project.  Now, while I still consider myself a, somewhat, new spinner, and I have probably bitten off far more than I can chew ...... I figured, it's a year long KAL, I can spin the wool up during the year for this project and by then end of it, I should be pretty proficient on my wheel.  Right?????????  Well, at least that's what I'm telling myself, lol.

Yesterday, I sat down and started spinning - portions of the pattern will be sent out on the last day of each month for 12 months.  I managed to spin up 2 bobbins of wool .... just letting them rest (I have to go to work, lol) and then I'll ply them tomorrow.  Wish I had a 4th bobbin so that I wouldn't have to do that Navajo plying .... it and I don't really play nice together, lol.  Here is a picture of my first bobbin full:


So far, I'm really enjoying spinning this stuff up ..... ask me again in a month or so if I still am, lol.  ˚Ü˚

Dec 27, 2010

Latest Project Pics

On December 23rd I finished my latest project .... a shawl for me.  Now, that may not sound like much to all who are reading this, but those that know me, know that I rarely keep any of my handcrafts for myself - I do a lot of charity knitting as well as custom orders.  Sooooooo, this is a really huge deal for me, lol.  I wanted a shawl that I could wear to Church, it is sometimes chilly in the Sanctuary - the shawl also needed to be a colour that went with anything.  Here is the back of it:
 
And here is a picture of the front - there are small crosses on the chest area .... they are a bit hard to see, but it's hard to get a good picture of them:

Dec 22, 2010

Finished another project

Today I finished up a new toque for Don ..... I had some glow in the dark yarn in my stash and wanted to use some of it - that stuff is sooooooooo fun.  Anyway, we discussed how I should make the toque, what he wanted on it, etc. and I got to work.  Ripped it out, re-started it, ripped it out, re-started on it, ripped it out (sensing a theme yet, lol) and re-started ..... thankfully, this time it worked out.  I was trying to make a beanie type hat, but double thick - when he tried it on, he asked if I could add some ribbing to the edge, but shape it a bit so that it would be longer on the sides and back, but not on the front.  No problem.  ˚Ü˚

 
And here is a, slightly, blurry picture of the side of it:


He wore it tonight when we went on caroling on a sleigh ride with our Church - it was a bit chilly out, however, he says that his head stayed nice and warm.  ˚Ü˚

Dec 7, 2010

Homemade yogurt

I'm not sure about the rest of you, but I love yogurt - the flavoured kinds are okay, but I really enjoy a bowl of plain yogurt ..... wanna know why??????  Okay, I'll tell you, lol.  I like the plain yogurt because I can add whatever flavouring I want - jam is really good in it, so is chocolate syrup, but my absolute favourite topping for plain yogurt is homemade coffee syrup (like the Nescafe Ice Java, which you could easily use that if you don't have the homemade stuff) and just a smidge of sugar.  ˚Ü˚

This morning I was checking out the recently added patterns on Ravelry (crafters, if you don't have a membership there, you really need to sign up - that site is amazing!!!!!!!!!!!!) and I happened to spy a pattern for a jar cozy when making yogurt.  I clicked on it and it took me to the designers blog - not only does she have the pattern there, but she has a recipe to make homemade yogurt - how cool is that, lol.

Now, I have to admit that I've made yogurt before, using my smaller (4 qt) crockpot - but that ends up taking up a lot of counter space that just isn't really available in my house (why do trailers lack counter space and storage space??????????).  Anyways, if I make the yogurt this way, then I'm not using up one whole counter just for the crockpot and I can store it in the fridge using the same jar that it was made in - sounds like a win/win situation to me.  ˚Ü˚

Nov 24, 2010

Wonderful day at home

Today was a great day ..... the kids and I have spent the entire day at home - normally we would go to the library in the afternoon (after they finish Spanish).  However, today, after Spanish was finished, the kids geared up and headed out to the tobogganing hill that they have set up.  Tomorrow and Friday we are staying home, too - normally on Thursday I head into town for weaving, but with Don's car being broke down, I get to enjoy being at home.  ˚Ü˚

Yesterday evening, Don phoned me and asked me to come and pick him up from where he works.  He had stayed late to work on his car - he had got a new radiator for it.  When he started it up, there was white smoke coming from the exhaust as well as antifreeze ...... sooooooo, Charlotte went out and started the car while I changed from my work clothes.  Then, both of us (Josh decided to stay home) put on our winter gear (warm toques, warm mitts, etc.) and headed into the next town to pick him up.  As you can imagine - he was pretty bummed about his car being broke down .... not sure how much it will cost to get it fixed (if you could add this to your prayer list, we'd sure appreciate it).

In all honesty, right now, I'm okay with us (basically) being down to one vehicle ..... I'm not a huge fan of winter driving - I can do it .... just not a fan of it.  So, every year, I look forward to winter coming so that I can stop the driving here and there that we do so much of during Spring through Fall.  I can stay inside my house, work on my handcrafts, help the kids out with their schooling and just basically enjoy all that comes with staying home.  There will be a few times that I'll need to take Don to work so that I can use the car - those are for things that were booked last month for this month and some of next month - but, other than that ..... I get to stay home.  ˚Ü˚

Today, a friend came over with her two kids (I think the kids are 6 & 3) ..... anyway, she wanted to learn more about knitting - mainly how to make an easy pair of slippers (she is a beginner knitter).  I looked up the pattern for Aunt Maggie's Slippers on Ravelry, printed it off and gave it to her - if you want a very easy, knit, pair of slippers to make, these are the ones.  One of the great things about them is that they are knit flat, so you can use two separate balls of yarn and make both slippers at once.  ˚Ü˚

For supper tonight, I decided that we would have sweet and sour beef - Don bought a few steaks (it is cheaper for me to cube these than it is to buy actual stewing meat) for me to make up S&S beef.  After our company left today, I got it all ready and it is now in the slow cooker .... just have make rice and a veggie to go with it.  It's been a while since I've made this, so it'll be a real treat for Don and the kids (they all love when I make this particular dish).  ˚Ü˚

On the weaving front - I have started a new lapghan to donate to the PSM at our Church.  Many of the men in our congregation are not the 'shawl' type, so, at the suggestion of our Pastor, I started weaving lapghans for them.  The women get the shawls and the men get the lapghans ..... this will be the second one that I've made and donated (although I have enough warp on my loom to make two of them, which is what the plan is):


And here is a close up of the weaving:


The second lapghan that I'll be making will have the cream coloured warp but I'll use a different colour of fuzzy yarn for the weft - I love how soft these turn out.  ˚Ü˚

Nov 12, 2010

Latest Project

Last night I completed another Prayer Shawl - on Sunday, it will be given to our Pastor so that she can pass it out to any congregation member that is going through troubling times (divorce, death of a loved one, etc.).


This Prayer Shawl was made using a double-ended crochet hook, called a Cro-hook, the yarn is a brand that Wal-Mart used to sell called Georga.

I currently have three more Prayer Shawls on the go, two that have cables throughout (they are identical except for the colour I'm using for them) and the third is a triangular shawl .... plain stockinette with a garter stitch edging.  I'll post pictures of them when they are completed.  ˚Ü˚

Nov 1, 2010

Little bit of this and that

Yesterday both the kids went to their friends houses .... Josh was picked up around 3 and I took Charlotte over to her friends house , she went trick or treating and then spent the night there - they (the two girls) are both homeschooled and were planning on doing up some sewing today (Charlotte has been wanting to learn how to use her sewing machine for a while now .... I've just never got around to sitting down with her to do it).  Josh and his buddy hung out, watched a movie and played games - sounds like a great evening to me.  ˚Ü˚

After we picked Josh up we headed in to Wal-Mart, we needed to get a couple of things for Josh's birthday party (which is quickly approaching) - while we were there I found this little item:

I used to have one similar to this and I wore it out - so, when I saw this one last night, I snagged it right away and when we got home I set it up.  Sometimes there are just to many "noises" coming from all the electric gadgets we have (TV, DVD player, digital clocks, stereos, etc.) and I just need to block them out .... ear plugs tend to hurt my ears after a while so I save those for nights that I need to block out all noise so I can get some much needed sleep.


A few months ago I bought myself a portable stereo to play a sleep CD - the CD works great but the noise that comes from the stereo (even when it is turned off) was enough to drive me insane .... so, I was really excited to see this Conair sound spa.  When we went to bed last night, I turned it on to Tropical Forest, but had to change it because those birds were not helping me sleep, lol.  I switched it to Rainfall and quickly fell asleep - this morning when our lovely neighbours let the dogs out at 6:30 in the morning, and they started barking like crazy, I closed the window and turned the machine back on ... promptly fell back asleep.  I'm really liking the timer feature that it has, too .... you can turn that on and in 60 minutes it will automatically shut itself off - it also runs on batteries or a supplied power cord.  ˚Ü˚

A couple of weeks ago, I started doing a KAL (Knit Along) with some fellow shawl makers .... so far, it is turning out really great (it's called a Celtic Cable Cross shawl).  Here's how it looks after completing the second chart for it:
I'm making another one in a different colour because I want to keep one for myself, lol.

Oct 5, 2010

Another project finished

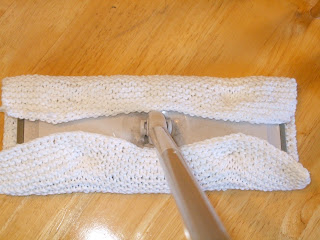
Last Wednesday, I had been chatting with a friend about reusable cloths for the Swiffer Sweepers (not the carpet ones) - she had mentioned that she was a little leery about using the reusable ones because the ones that you buy pick up the dirt and stuff really well.  I mentioned to her that I knit the reusable cloths for my Swiffer Sweeper and that I would make one for her to try out.

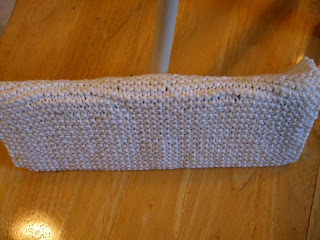
So, last week I decided that I would use this as a learning opportunity to finally learn how to knit Continental Style .... the first one that I cast on, I didn't finish because I ran out of yarn.  The second one that I cast on was started on Sunday and finished on Monday - I mainly worked on it while I was vegging out on the couch (this cold is making it so that I don't have a lot of energy to do very much).  Here are the finished pictures of it (I cast on 50 stitches on 5mm knitting needles and knit in garter stitch until it was 8" long, cast off, weave in ends and enjoy):

Here it is laying flat.

I've put it on the Swiffer .... if you didn't like poking it into the holes, you could stitch up short ends (left and right of picture).

Showing the bottom of the Swiffer with the cloth on.


I really like how the reusable ones work - I make them out of the Bernat Handicraft Cotton (dishcloths are made out of this yarn).  They pick up pet hair like a dream - which is a good thing because our dog is shedding like crazy right now - something about the changing seasons (and he has mostly black hair *sigh*).  ˚Ü˚

Sep 30, 2010

Latest Project Pics

Yesterday was such an amazing day for us - the kids finished their schoolwork on time, watched a movie (while I finished up a pair of mittens), then we went to the library, came home & had supper and I took Charlotte to her new babysitting job .... it was her first time babysitting at this home (and her second time babysitting), so she wanted me to be there, just in case - I asked the Mom (she's a very good friend of ours) if this was okay and if I could do some felting while I was there (she said yes to both).  Soooooo, while Charlotte babysat the kids, I did some felting and was basically just decoration, lol.

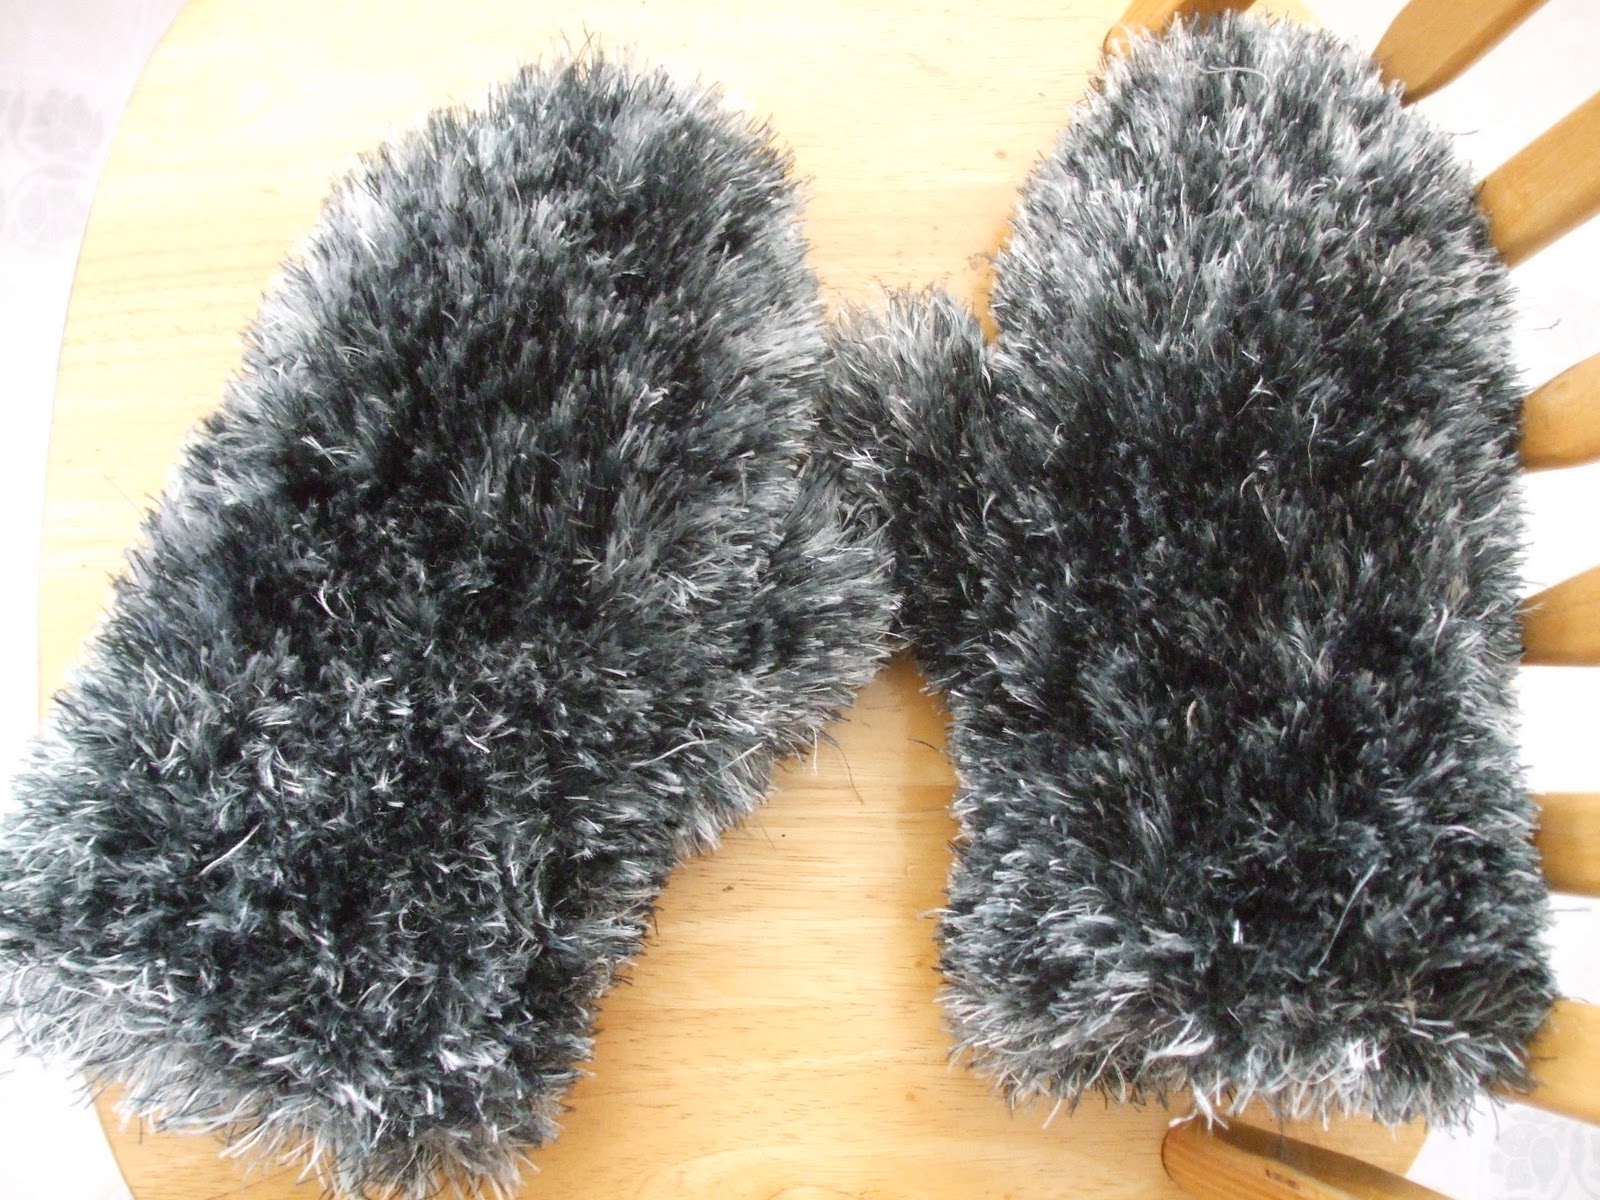
Last year (at least I think it was last year) I started making, what I call, furry felted mittens - I had seen a picture of them on the Internet, done up in blue (they reminded me of Cookie Monster, lol) and decided that I really needed to see if I could make a pair of these.  I tried it and it worked out fantastic - to date, I have made (and sold) 10 pairs of these mittens.  ˚Ü˚

On to the pictures of the last ones that I've made - as well as the new dryer I have for them once they are felted:

*
*
*
*
*
*
*
*


Here are two of the pairs on the new dryer - I can't believe that it took me so long to (1)figure out to use one of these and (2)to get one, lol.

This thing is fantastic - you place the items on it and set it over the register, when the furnace kicks in, it blows warm air into the mitts (or whatever else you need to dry) and dries them on the inside ..... I think I need a couple more of these, though.  ˚Ü˚

Here are mine - these ones are waiting to go on the dryer.  Not sure if you can see it, but after they were felted, I flared out the cuffs .... I did this because I want them to go over top of the sleeves on my winter coat.  I tried them on over a pair of fingerless mitts that I had made and they are soooooo comfy - now, when I have to take my furry mitts off to do something, my hands won't be so cold (my fingerless mitts didn't fit very well under my last pair of bulky type mittens).

This pair has been sold - I used light blue wool and the multi-coloured fun fur .... I think the colour combo turned out pretty nice.

I had a hard time getting a picture that showed the shading in this fun fur (that's why I posted two pictures of them) - it's kind of silver and black together.  The wool that I used was a darker grey - it went very well with the colour of fun fur used.  These ones are also sold.

Now, I'm trying to figure out a pattern to make double-knit mittens ... it's got me stumped right now, but I'm going to keep playing with it and see if I can figure it out.  I emailed the designer and he hasn't gotten back to me - sooooo, I've enlisted the aid of some fellow knitters on one of my knitting groups.  The advice that they've given me is pretty good and I think that once I get a chance to actually sit down and try them all, these mittens will no longer be beating me, lol.